
Introduction
Looking to gain a flawless floor installation? Whether you’re a DIY enthusiast or a seasoned contractor, mastering the right strategies is critical. In this manual, we’ll percentage 6 tips For laying floor Like a Pro —straight from enterprise professionals.
These professional-subsidized strategies will assist you in avoiding common mistakes and ensure your floor project looks perfect every time. From education to precision, find out 6 tips for laying floor like a real professional.
Table of Contents
Step One: Figure Out Your Tile Layout
6 tips for laying floor, Start by snapping chalk lines between the center points of opposing walls which will intersect at the center of the room make sure they are perfectly square and adjust them if necessary next add grid lines in two foot sections in the direction where you want to start the tile.
This will give you an idea of how the tile will end up at each end of the room having this information before you start laying the tile gives you an opportunity to shift the design left or right up or down to make sure you don’t end up with odd looking slivers of tile at the most visible ends.
After mocking up several layouts and considering the length of our 24 inch tile we settled on a 1 3 offset which means the first row will start with 8 inch tile length the second row will be 16 inches long and finally the third row will start with a full 24 inch tile.
Step Two: Surface Prep
6 TIPS For Laying Floor, Before you start you’ll want to remove any molding trim appliances etc which could interfere with the installation we want a little extreme and remove the entire kitchen most tiles can be installed over most subfloors as long as they are clean smooth dry and are free of wax soaps gum or grease in our case.
We’re working with jib creed subfloors because it’s very brittle it sustains some damage during an old tile removal, so to prep our surface we started by painting on a waterproofing membrane to prevent the jib creed from pulling moisture out of the mortar next we installed the metal lathe attempted to level the floor with mortar check out the process in the link below let’s just say it could have gone a lot smoother.
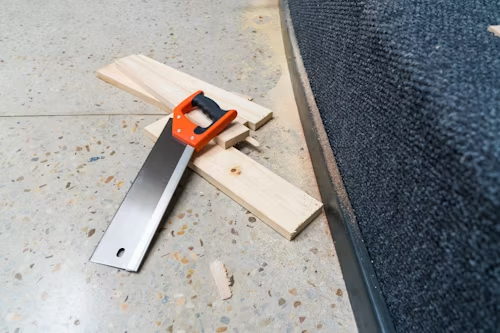
Step Three: Cutting Tile
Carefully measure the tile to be cut and mark it with a pencil or a felt tip pen in our case the layout is very simple yet brilliant because one cut tile will have both an eight inch piece for row one and a sixteen inch piece for row two this eliminates a lot of the tile waste and halves the number of cuts we set up a jig on our tile saw for cutting.
Our tile but for this basic pattern a tile cutter would work just as well if you’re going to use the tile saw make sure you select the correct blade for the type of tile you’re installing.

Step Four: Applying Mortar
6 TIPS For Laying Floor these are very important for the success of this project to research. 6 TIPS For Laying Floor;
- When installing 12×24 inch tile, use the proper mortar—like Versabond LFT Gray Fortified Medium Bed Mortar. LFT stands for Large Format Tile, which includes any tile with a aspect longer than 12 inches. Always study and comply with instructions at the bag.
Only blend sufficient mortar to apply inside 30 minutes to keep away from lack of strength. Start with a small amount (approximately 1/2 a Home Depot bucket) and growth as you get quicker.
Use the recommended trowel kind. Apply a ¼-inch coat with the flat facet, then comb into ridges at a forty five-diploma perspective the usage of the notched side. Remove excess for a uniform putting bed. - Work in small sections—no more than you may tile in 15 mins. If it’s your first time, begin with one tile at a time and enlarge your work area as you gain self assurance.TIPS For Laying Floor – Plan clever, paintings in batches, and observe mortar suggestions for first-rate results.
Step Five: Setting Tile
The fiveth out of 6 TIPS For Laying Floor, Not sure if you notice but the variation of shades is an inherent characteristic of ceramic tile so for a good blend effect you should always mix the tile from several boxes as you set them if your room size allows try to get all your tiles from the same color lot this information can be found on the side of the tile box.
If you’re working with a large room you can always custom order color lots if you’re buying in pallet size quantities at your local big box store most of the time you should begin installing tile in the corner of the room on the last reference line closest to the wall and work your way out from there do not ever use the room balls as the guide for laying tile.
6 TIPS For Laying Floor (for beginners)
- 1. Use a tile leveling system
- Especially for large tiles, a leveling system helps to ensure a flat, even the surface. As a beginning, there should be one.
- 2. Put the tile straight down
- Avoid sliding tiles. To avoid the collapse of the mortar, press them directly into the mortar bed.
- 3. Always use tiles distance
- Put spacers on each corner to hold the bird lines. For large tiles, use a consistent pattern for best results.
- 4. you go like pure joints
- Remove extra mortar with a putty and wipe the tiles with a damp sponge. Never let this step! It cleans hours later.
- 5. Leave the current holes around the edges
- Fit circumference tiles leave a difference between empty inch between finals and tiles and walls. This allow for expansion and a clean finish.
- 6. Use the correct mortar and pattern
- For large format tiles (more than 12 inches), avoid running binding patterns with over 1/3 overlap. Use large formats and expand up to 3/16 inch joints.Help make your project smooth and successful – especially on your first try!
Step Six: Grouting the Joints
The sixth step out of 6 tips for laying floor, Generally wait time for grouting joints is about 24 hours but you should refer to the grout packaging for specifications carefully read and follow all the instructions and precautions and only make enough to use in about 30 minutes spread grout onto the tile surface at a 45 degree angle forcing it out into the joints with a rubber grout float remove excess grout from the surface.
Immediately with the edge of the float at a 90 degree angle scraping it diagonally across the tile wait 15 to 20 minutes for the grout to slightly set and then use a damp sponge to clean the grout residue from the surface and to smooth the grout joints rinse the sponge frequently and change the water as needed.
6 TIPS For Laying Floor, Keep in mind that the 15 minutes starts when the grout is first laid so by the time you finish the room it’s possible that you can go back and start leveling the grout as the grout dries it will form haze on the tile surface, you may have to make several passes to clean up the haze with a slightly damp sponge and clean water if necessary and finally wait 72 hours for heavy use of your tile don’t apply sealers or polishers for the first three weeks. These are 6 tips for Laying Floor.
Q1: What are the 6 TIPS For Laying Floor?
A: Prepare the subfloor – clean, level, and dry.
Acclimate materials – let flooring adjust to room conditions.
Plan layout – start straight, use spacers for expansion gaps.
Use proper tools – saws, nailers, or adhesives as needed.
Install in sections – work methodically for alignment.
Finish edges and transitions – trim, moldings, and seal gaps.
Q2: Can I install new flooring over old flooring?
A: Sometimes, but it’s best to remove old flooring to ensure a smooth, stable subfloor. Exceptions include installing laminate over smooth, well-attached vinyl.
Q3: How long should I wait before walking on a newly installed floor?
A: Wait at least 24 hours, especially if glue or adhesive was used, to allow proper setting and avoid shifting.